Learning how to arrange multiple designs on a DTF gang sheet can help you reduce printing costs, use available film more efficiently, and simplify production for custom apparel orders. Instead of ordering each logo, name, graphic, or label separately, you can place multiple designs on one print-ready sheet. This approach is especially useful for print shops, clothing brands, event organizers, Etsy sellers, and small businesses that regularly produce several garment styles or design sizes. However, an effective layout requires more than filling every empty space. Correct dimensions, sufficient spacing, transparent backgrounds, image resolution, orientation, and cutting requirements all affect the final result.
This guide explains how to organize different artwork files, select appropriate sizes, create an efficient layout, and prepare a professional DTF gang sheet for printing.
What Is a DTF Gang Sheet?
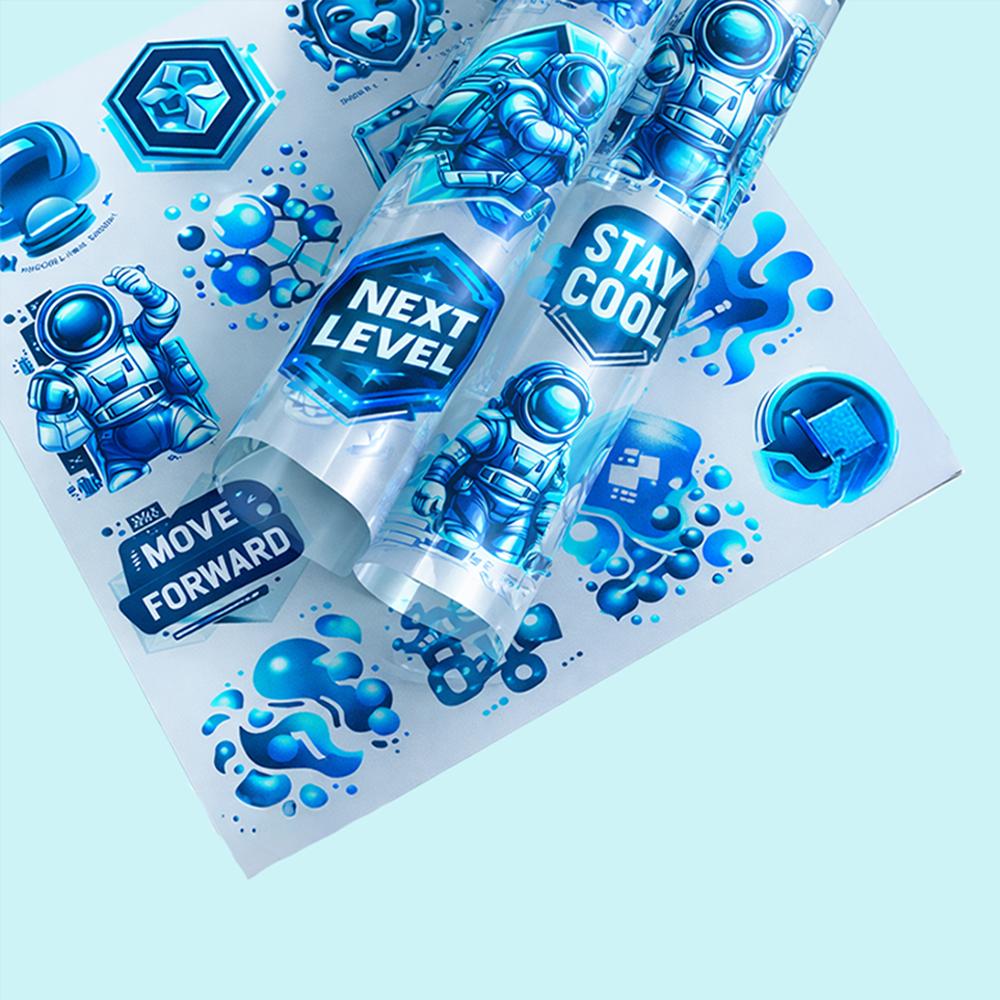
A DTF gang sheet is a single print area containing several individual designs. The sheet may include logos, full-front graphics, pocket prints, sleeve designs, names, numbers, neck labels, or repeated artwork. After printing, each transfer can be cut from the sheet and applied separately to a garment using a heat press.
The main advantage is efficient use of space. Customers can combine different designs instead of paying for unused film around each individual transfer. A well-organized sheet can support one large production order or several smaller projects.
For a broader explanation of digital image construction, resolution, and pixels, see the Wikipedia overview of raster graphics. Understanding raster images is useful because many DTF files are supplied as transparent PNG artwork.

Why Design Arrangement Matters
Placing artwork randomly may leave large gaps, create cutting difficulties, or result in designs being printed at the wrong size. A carefully arranged DTF gang sheet provides several benefits:
- More designs can fit within the selected sheet dimensions.
- Film waste and unnecessary production costs can be reduced.
- Repeated designs remain consistent in size.
- Individual transfers are easier to identify and cut.
- Orders can be organized by garment, customer, size, or project.
- Print-ready artwork is less likely to require last-minute corrections.
Efficient arrangement does not mean removing every gap. Designs still need enough separation to be cut without damaging neighboring transfers.
Choose the Correct Gang Sheet Size
Before arranging artwork, confirm the width and length of the sheet you plan to order. Your digital canvas must match the selected print dimensions. A file created at the wrong size may be scaled automatically, cropped, rejected, or printed differently from what you expected.
Begin by estimating how many transfers you need and the final dimensions of each design. For example, an order might contain:
- Ten 11-inch full-front designs
- Ten 4-inch left-chest logos
- Twenty 3-inch sleeve graphics
- Twenty-five small neck labels
Create a simple production list before building the sheet. This prevents forgotten designs and makes it easier to select an appropriate length.
Customers who already have a complete print-ready layout can use the Upload DTF Gang Sheet option. When a layout still needs to be built, the DTF Gang Sheet Builder provides a more convenient way to add, resize, duplicate, and organize artwork online.

Prepare Every Design Before Building the Layout
Correct artwork preparation should happen before designs are placed on the canvas. Trying to repair files after the entire sheet has been arranged can create inconsistent sizing and unnecessary rework.
Use Transparent Backgrounds
PNG files should have transparent backgrounds unless a colored rectangular background is intentionally part of the design. A white background that appears invisible on your computer screen may print as a solid white box.
Inspect every file against both light and dark backgrounds. This helps reveal hidden white pixels, rough edges, leftover background sections, and unwanted outlines.
Use High-Resolution Artwork
Prepare raster artwork at approximately 300 DPI at its intended print size whenever possible. Increasing the DPI number without improving the actual pixel dimensions will not restore missing detail.
For example, a small web image should not simply be enlarged to fit an adult shirt front. Enlarging low-resolution artwork can create blurry text, pixelated edges, and rough gradients. Always evaluate the image at its final physical dimensions.
Confirm Final Print Dimensions
Every design should be sized according to its intended placement. Common categories include:
- Left-chest logos
- Adult full-front graphics
- Youth shirt designs
- Sleeve prints
- Back graphics
- Neck labels
- Tote bag designs
Do not rely only on how large the artwork looks on the screen. Confirm the actual width and height in inches.

How to Arrange Multiple Designs on a DTF Gang Sheet Step by Step
1. Place the Largest Designs First
Start with the artwork that occupies the most space. Large full-front and back graphics are more difficult to fit around smaller elements, so they should establish the basic structure of the layout.
Place large rectangular designs in rows when possible. After the largest artwork is positioned, use the remaining gaps for pocket logos, sleeve prints, labels, and other small elements.
2. Group Designs by Similar Size
Organizing similar dimensions together creates cleaner rows and reduces irregular empty spaces. A section of 4-inch logos can be aligned more efficiently than a random mixture of 4-inch, 9-inch, and 11-inch designs.
Grouping can also make cutting and order fulfillment easier. For example, all left-chest logos can occupy one area while adult fronts, youth fronts, and neck labels occupy separate sections.
3. Rotate Artwork When Appropriate
Some designs can be rotated 90 degrees to use narrow spaces more efficiently. Rotation can be particularly helpful for vertical logos, sleeve prints, names, and rectangular labels.
However, artwork should only be rotated when doing so does not create confusion during sorting or application. If the entire sheet contains many similar designs, maintaining a consistent orientation may be more valuable than filling every small gap.
4. Leave Cutting Space Between Designs
Do not allow separate graphics to touch. Leave a small margin around each design so it can be cut without damaging neighboring transfers. The required spacing may depend on the artwork shape and your preferred cutting method.
A practical starting point is approximately 0.25 inch between designs. More room may be useful for irregular shapes, large production orders, or sheets that will be cut quickly by hand.
Spacing should be measured between the visible edges of each design, not merely between the boundaries of transparent image files. An image may contain a large invisible canvas that creates wasted space even though the visible artwork looks small.
5. Fill Gaps with Small Artwork
After arranging the main graphics, inspect the layout for narrow gaps and open corners. These spaces may accommodate:
- Neck labels
- Small brand logos
- Sleeve graphics
- Care labels
- Sample prints
- Extra copies of popular designs
Small repeat designs are useful for filling irregular spaces, but do not add transfers simply to make the sheet look full. Each item should have a clear production purpose.
6. Duplicate Designs Only After Confirming Their Size
Set the correct dimensions for one copy before duplicating it. If artwork is duplicated first and resized later, some copies may remain at the wrong dimensions.
After duplication, count each version carefully. A simple naming system can help:
- Logo A – 4 inches – Quantity 12
- Logo A – 10 inches – Quantity 6
- Design B – Youth – Quantity 8
- Design B – Adult – Quantity 15
This avoids confusion when the same artwork appears in multiple sizes.
7. Keep Important Details Away from Sheet Edges
Avoid placing artwork directly against the outer boundary of the canvas. Even when a printer can use most of the available width, a small safety margin reduces the risk of clipping.
Inspect all four sides of the sheet before exporting or submitting the order. Pay special attention to transparent artwork because its visible edge may be difficult to identify against the canvas.
Arrange Designs by Production Workflow
Space efficiency is important, but the most compact layout is not always the fastest layout to process. Consider how the transfers will be cut, sorted, and pressed.
For example, a print shop producing orders for several customers may divide the DTF gang sheet into clearly defined sections. Each section can contain one customer’s artwork or one garment type. This approach may use slightly more space, but it can reduce sorting mistakes.
Possible organizational methods include:
-
By customer: Keep each customer’s designs together.
-
By garment: Separate shirts, hoodies, tote bags, and uniforms.
-
By design size: Group full-front, left-chest, sleeve, and label transfers.
-
By order priority: Place urgent orders in a clearly identifiable section.
-
By color or design family: Group similar artwork for easier visual identification.
Common Gang Sheet Arrangement Mistakes
Making Designs Too Small
Reducing artwork to fit more copies may make text unreadable and fine details difficult to reproduce. Always preserve the minimum practical size for the design.
Ignoring Transparent Padding
A PNG file may contain unnecessary transparent space around the artwork. This invisible padding prevents designs from being placed close together and wastes usable sheet area. Crop the canvas around each design before uploading it.
Stretching Artwork
Changing width and height independently can distort logos, circles, faces, text, and other elements. Lock the aspect ratio when resizing artwork unless distortion is intentional.
Using Inconsistent Sizes
Repeated logos should have identical dimensions. Small differences may become obvious when garments are displayed together as staff uniforms, team apparel, or branded merchandise.
Adding Unnecessary Backgrounds
Check every file for white rectangles, shadows, stray pixels, and background layers. Print only the elements intended to appear on the garment.
Leaving No Room for Cutting
A tightly packed sheet may look economical on the screen but become difficult to separate. Saving a small amount of film is rarely worth damaging transfers during cutting.
Manual Upload or Online Gang Sheet Builder?
The best ordering method depends on whether the complete layout has already been prepared.
Choose the gang sheet upload option when you have created a print-ready canvas in design software and verified its dimensions, resolution, transparency, spacing, and design quantities.
Choose the online DTF gang sheet builder when you want to upload individual graphics and arrange them directly within the selected sheet size. A builder can make it easier to resize, rotate, duplicate, and position multiple designs without preparing the full canvas separately.
You can also visit the DTF Print House homepage to explore available custom DTF transfer ordering options.
Final DTF Gang Sheet Checklist
Before submitting the layout, review the following points:
- The canvas matches the selected sheet dimensions.
- Every design is shown at its intended print size.
- Raster images have sufficient resolution at the final size.
- Backgrounds are transparent where required.
- Artwork has no stray pixels or unwanted outlines.
- The aspect ratio has not been distorted.
- Repeated designs have consistent dimensions.
- The correct number of each design is included.
- There is enough room between designs for cutting.
- Important artwork is not positioned against the sheet edge.
- Small text and details remain readable.
- The final file has been reviewed at full size.
Create a More Efficient DTF Gang Sheet
Understanding how to arrange multiple designs on a DTF gang sheet makes custom transfer ordering more efficient and predictable. Start with accurate, high-resolution artwork, confirm the final size of every graphic, place large designs first, group similar items, and use smaller artwork to fill practical gaps. At the same time, preserve enough space for cutting and organize the sheet around your real production workflow.
A successful DTF gang sheet is not simply the layout with the least empty space. It is a print-ready file that uses film efficiently while keeping every transfer correctly sized, easy to identify, and easy to separate. Once your layout is complete, upload the print-ready sheet or use the online builder to prepare multiple designs for your next apparel production order.

Frequently Asked Questions
How much space should I leave between DTF designs?
Approximately 0.25 inch is a practical starting point for many layouts. Irregular designs or transfers that will be cut quickly by hand may require additional space.
Can I put different design sizes on the same gang sheet?
Yes. A single sheet can include full-front designs, left-chest logos, sleeve graphics, names, numbers, and labels as long as each item is set to the correct final dimensions.
Can I rotate designs on a DTF gang sheet?
Yes. Rotating rectangular or vertical designs can help use available space. Rotation does not affect the transfer as long as the artwork retains its correct dimensions and aspect ratio.
What file format is best for a DTF gang sheet?
A high-resolution PNG with a transparent background is commonly used. The full canvas should match the selected sheet dimensions, and the artwork should be prepared at the intended final print size.
Should I place designs directly against the sheet edge?
No. Leave a small safety margin around the outer edges to reduce the possibility of clipping during production.
Can low-resolution images be used on a gang sheet?
Low-resolution images may appear blurry or pixelated when printed. For clean results, use high-resolution artwork and evaluate it at the actual dimensions at which it will be produced.
How do I fit more transfers on one sheet?
Crop transparent padding, group similar sizes, rotate suitable designs, place large graphics first, and fill remaining spaces with smaller transfers. Do not reduce designs below their practical application size.
Is it better to upload a completed sheet or use a builder?
Upload a completed sheet when the full print-ready layout has already been created and checked. Use an online builder when you need to upload separate files and arrange, resize, rotate, or duplicate them within the chosen sheet.